Science Week 2020, now in its 25th year, will take place from November 8th to 15th. With Covid this year, many 2020 Science Week events will be held virtually, so you may be able to attend events outside of your local area. You can check Science Foundation Ireland as they fund a number of regional festivals offering a range of opportunities for the public to engage with Science.
Here a few science activities that have gone well in my classroom over the years…well, the ones I managed to catch on camera!
The changing colour of milk experiment!
The food colouring in this experiment shows what happens when you mix fat loving substances ( milk) and water loving (washing liquid/ soap) substances.
What You’ll Need:
• Milk — different percentages (whole, 2% and skim)
• Food colouring
• Washing up liquid ( I put a dot on the end of a skewer)
• A shallow bowl with a wide diameter
Directions:
Fill the shallow bowl with milk.
Drop food colouring into the center.
Place a drop of washing up liquid on the food dye.
Test different color combos and the different milk percentages to see how the fat content creates different results.
Science: Investigating the effects of smoking on the lungs


Mouldy Bread Experiment
We did the mouldy bread experiment to test where germs are and how effective washing our hands with soap and water is versus using hand sanitiser.
We expected to be waiting 2-3 weeks to begin to see any mould growing due to the preservatives in the bread. Everyone wore disposable gloves for this experiment, all washing their hands very carefully.
Each pod had to do a different action with their bread. We had our control of untouched bread straight from the bread packet and into the sandwich bag with gloved hands.
The bottom image was a slice which was dampened with bread and water and left in a dark cupboard as pupils discussed how mould likes the damp and dark places.
Some interesting predictions were made!


Results of the bread put in the dark cupboard….

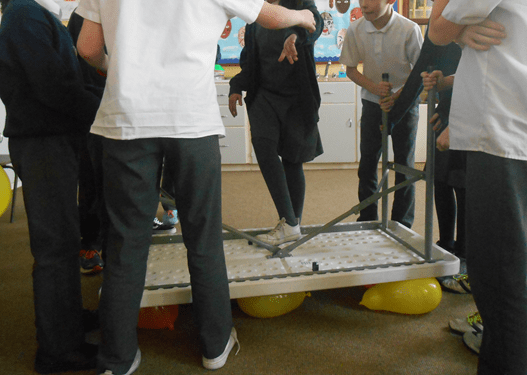
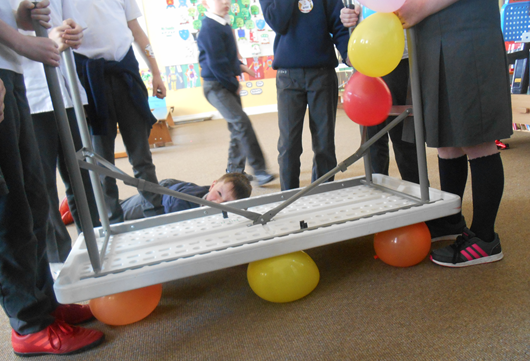
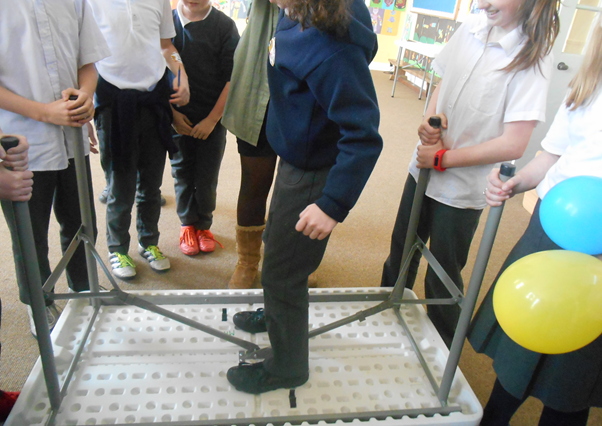
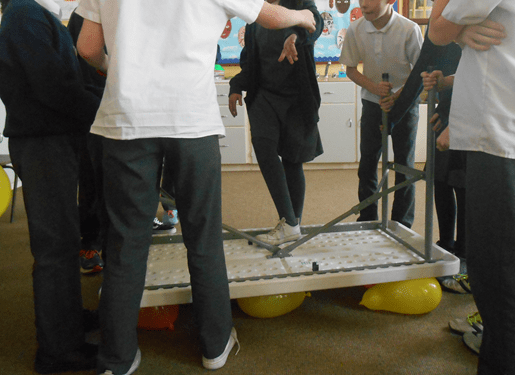
Walking on air (Science experiment)
Air is all around us but we can’t see it. Most of the time we don’t feel it. We find out how strong the wind is when it is very windy. When you blow up a balloon you fill it with air. If you squeeze the balloon, the air inside is also squeezed. The balloon changes shape when you squeeze it but the amount of air in the balloon stays the same. We investigated by filling 6 balloons to the same size, not over filling them with air- about half their usual size.
We placed the balloons on the floor.
We turned a table upside down and put it on top of the balloons.
One very brave pupils stepped carefully onto the table but we soon realised that the air in the balloons was strong and could hold lots of pupils. Only one balloon burst when the teacher (me) and all the pupils stepped onto the table!
Baggie and Pencil Magic!


Instructions:
1.Fill a ziplock bag about 3/4 of the way full with water and close.
2. Use a few sharpened pencils.
3. Push the sharpened pencils through the side of the bag and observe what happens.
Have a bucket or tub ready as one of my kids decided he wanted to take his pencil out and stick it in a different part of the bag!
The science:
No water spills out from the holes as the ziplock bags are made of a polymer. Polymers have long chains if molecules that are flexible. Basically, when you poke a pencil through the bag the molecule chains in the bag ‘hug’ ( make a seal) around the pencils so water doesn’t come out.
Thank you @third_class_teacher for sharing this experiment, the kids loved it and certainly hasn’t expected the results we got.
Science/ maths ( teaching time)
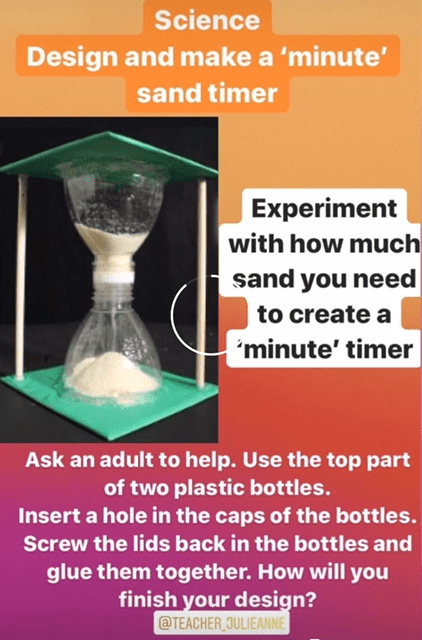
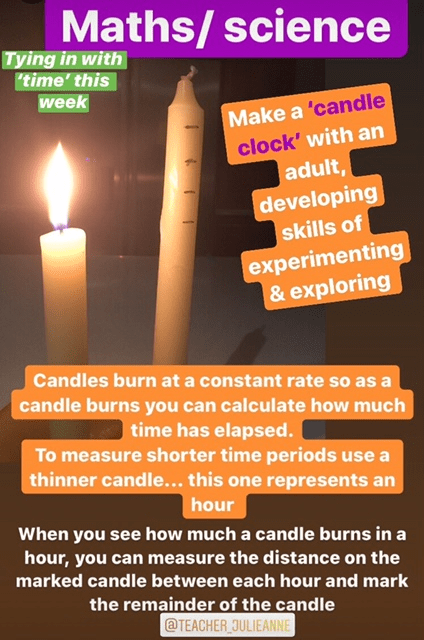
Someone was asking for lesson ideas for time (some ideas as you slide across the images but there are others are in my ‘time’ highlight on my home Instagram page) These are some ideas I put on my blog during The school closures of Covid Lockdown.
Great for teaching an understanding of time to children but in the week that is in it, the first two integrate with science.
They can be time consuming ( pardon the pun 😂) especially the design and make activity but one to remember whenever you happen to be teaching time thus year, you can integrate as science/ Engineering Week etc.
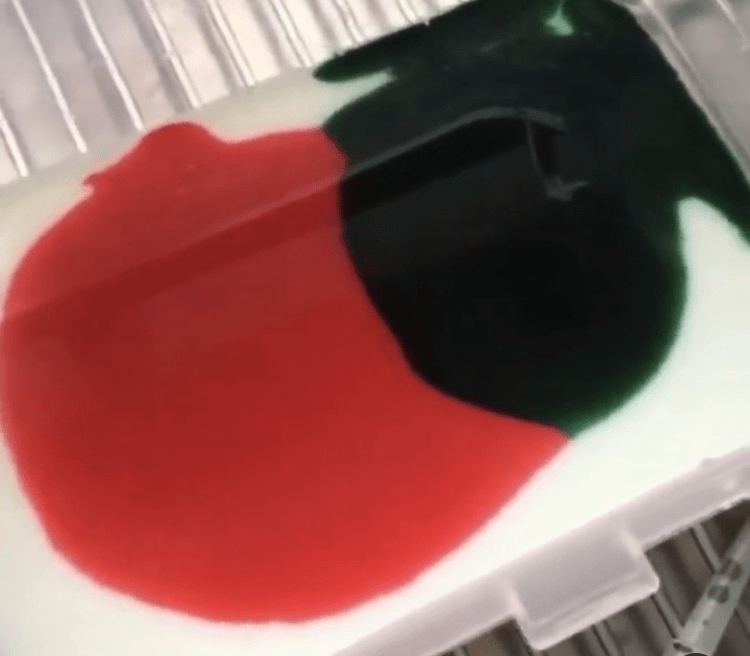
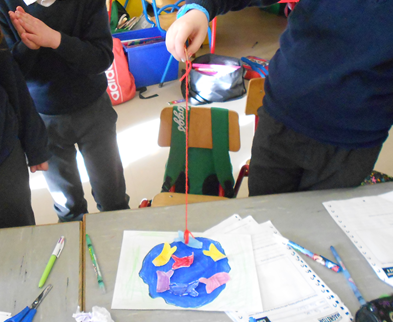
Dancing stick man / woman/ figure of your choice!

The science part:
When you make a drawing on the surface of a smooth bowl/ plate/ tray, the alcohol, that dissolves the ink ingredients will evaporate ( you can blow to speed the process) This leaves the color pigment behind on the surface. Because the ink is lighter than water it can float.
This this can be a nice addition/ interesting way to finish investigating sinking and floating.
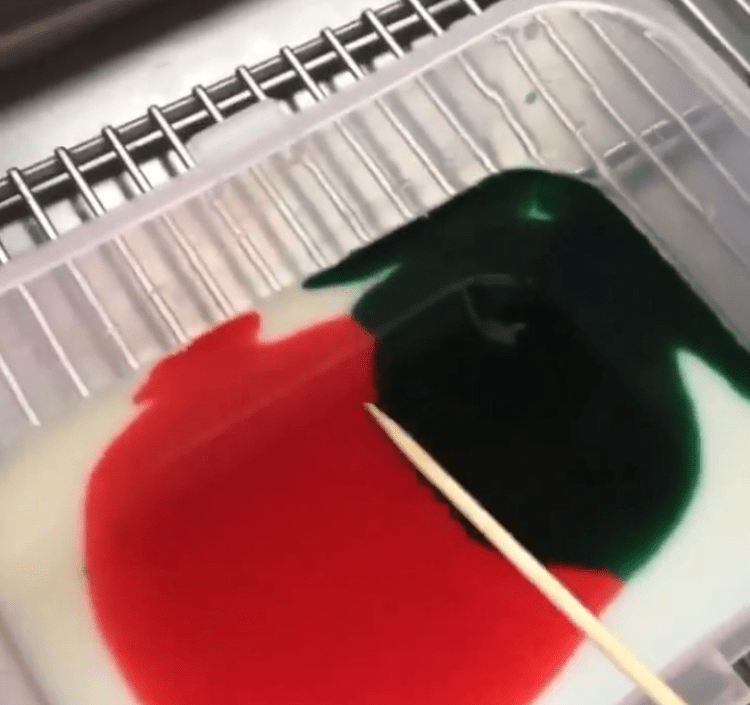
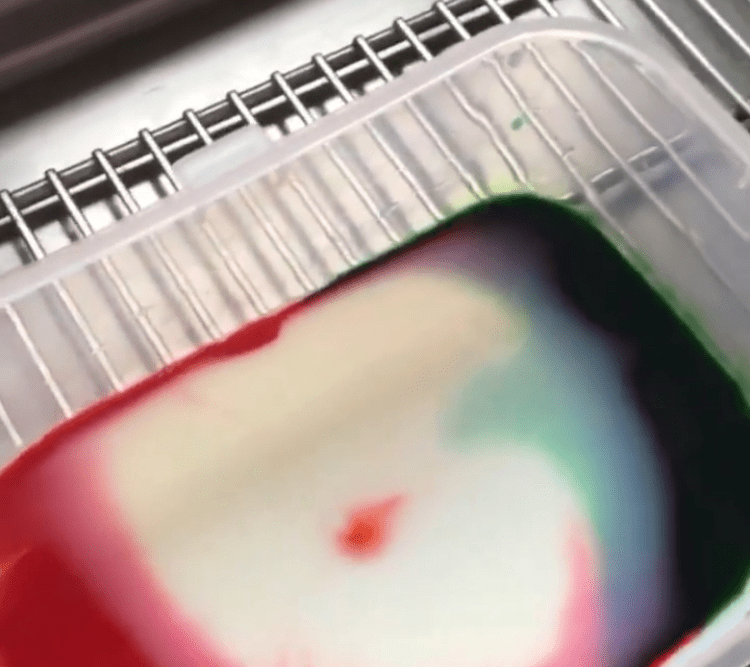
To do.., Draw a stick figure or any other design you want using a dry erase marker ( white board market). The colour doesn’t matter just make sure the lines are connected.
When I draw my stick figure I draw over it a second time not lifting the marker to ensure all lines are connected.
Plastic and metal tubs/ bowls didn’t work.., but sure isn’t it science investigation when trying to determine the best bowl to use!
Slowly pour water to the bottom of your stick figure and tilt the bowl as in my video. Ensure your stick figure is completely dry before using the water. It won’t work with a permanent marker!
Watch your stick figure come alive! You can use cold or warm water. Move the water to make him dance.., even blow on him!
See video on the dancing stick figure in action on my Instagram page @teacher_julieanne
Tie-dye T-shirts


- Tie-dying is not just about fashion, it’s a science experiment, art and fun rolled into one!
I give myself two days to complete this activity.
The scientific part!
Excellent for discussion of words such as absorption, soluble/ insoluble etc.
Absorption is a process by which matter (our t-shirts) takes in another substance (the dye and water mixture).
A substance that dissolves in another substance is soluble, in this case the dye is soluble in the warm water. If a substance does not dissolve, it is insoluble.
Talk about dyes as natural or synthetic substances used to apply colour to or stain other materials, such as fabrics and fibers.
What you need:
• Fabric dyes (I use Dylon fabric dyes from the local pharmacy. I get the larger one which is used with machines)
What you need:
• Large tubs/ boxes (with no holes!)
• Latex gloves/ good old ‘marigolds’
• Many strong elastic bands.
Day 1:
1. Apply the elastic bands to create patterns. The two patterns I find that children can create & which have lovely results are the circles created by ‘bull rings’ or the lines created by creating a fan with your t-shirt. (Details of these are below)
2. The large machine dyes have instructions to pop the dye into your washing machine. What has worked for me is to mix the dye with about 1 litre of warm water first (maths integration), pour into a large tub and stir with a wooden spoon. Add at least 6 litres of warm water. Add in the t-shirts to the tub of water. If you find the dye mixture is not covering the t-shirts, add 2 more litres of warm water (not boiling as you don’t want to shrink any t-shirts!)
3. I used three tubs of red, blue and green dyes. The darker dyes work out the best.
4. I let the t-shirts soak overnight.
Day 2:
1. In the morning I give the t-shirts a mix in case some are sitting at the top of the dye mixture and I let them soak for the duration of the day leaving myself an hour at the end of the day to drain the tubs at the sink, remove the elastic bands (with scissors) and give them a good squeeze to remove excess liquid.
2. Pupils put their wet t-shirts into a plastic bag & take the t-shirts home where they give them a cold rinse - Rings: See second image Lift the middle of the front of your t-shirt and wrap around an elastic band. The tighter they are on the better. You can use thin elastic bands which create thin lines or thicker elastic bands which give you thicker lines. Put on a few elastic bands as in the image depending on how many ‘rings’ you will want. You can do the same to the back of your t-shirt, sleeves etc.
Vertical lines: see first image. Fold your t-shirt in a concertina fashion and wrap the elastic bands as in the last image. The amount of elastic bands you put on is the amount of vertical lines you will create.
If your pupil/ child uses a long-sleeved t-shirt, it looks lovely to have the rings in the centre of the t-shirt and the vertical lines in the sleeves.
This works great on white t-shirts.
NB: We discovered during this process that school linen shirts do not take the dye very well. They absorb some dye but not enough so that the tie dye pattern is visible.
I used to have to add sodium (salt) to the dye mixture to ensure the colour would stick to the material but the sodium is already added to the machine dyes.
Enjoy! If you have any questions just ask.
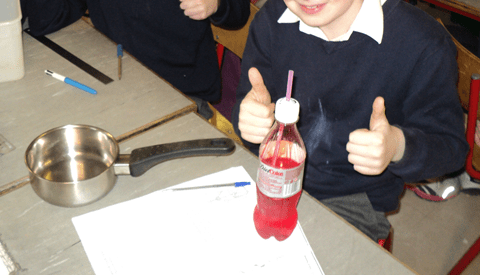
Explode a lunch bag… science 🧪


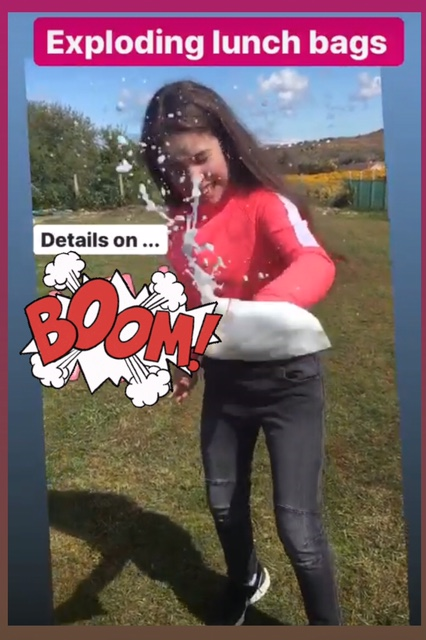
This is a another lovely experiment that worked well with my class last week. You will find different variations of this experiment with different ingredients such as adding warm water or having to measure the ingredients… but I find all you need is a good helping of white vinegar and bread soda.
Explanation.. vinegar is an acid, baking soda is a base. When the two mix they have a chemical reaction releasing another gas called carbon dioxide.
I will be linking this experiment to the bouncing eggs experiment this week also as we will use vinegar for it and we can discuss ‘acids’ in more detail. ( see my post on bouncing eggs)
You will need… a small ziplock lunch bag, white vinegar, bread soda, kitchen paper.
To do…
1. Pour a generous amount of vinegar into the bag ( we quarter filled each bag)
2. Shake a generous amount of bread soda into the centre of a square of kitchen paper ( slide across for image)
3. Lift up the four corners of the kitchen paper and twist at the top as in image.
4. Ziplock part of your bag in preparation
5. Gently placed the ball of kitchen paper/ bread soda into the bag and close the bag securely.
6. Ensure the bag is closed because the gas will escape otherwise and you will have no explosion 😅
I’d advise having a few practise runs of closing the bags before doing this experiment.
I have 5 pods in my room so each pod received all the ingredients and we worked outside ( it can get messy) … lots of little explosions 😁😉
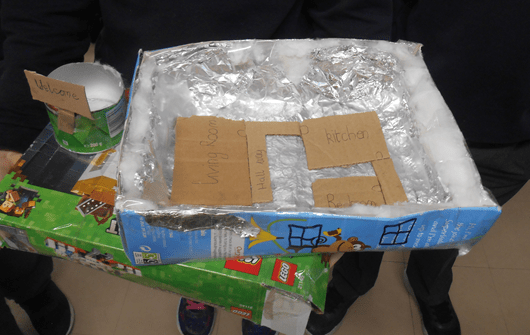
Design & Make an Explorers Hut in the Antarctic
Following learning about Kerry native Tom Crean the Antarctica explorer, pupils worked in their science groups (6 teams of 4 pupils) to design and make a hut for explorers in the Antarctica, where there is freezing conditions and ferocious winds. Also a lovely lesson for Engineers’ Week
Pupils had to design a home that traps the greatest amount of warmth for the explorers. Pupils discussed the best materials they could use for their huts, including insulating; cotton wool, newspaper (homeless people insulate their bodies with newspaper!), tin foil.
Most of the groups built cavity walls in their huts and filled the cavities with insulating materials.


Science eggggsperiment! 🧪 BOUNCING EGGS EXPERIMENT!


Instructions… cover an egg with white vinegar in a glass… this way you can see changes day by day. After a few days you should be able to take the egg out of the glass and the remainder of its shell will rub off easily. You are left with the egg encased in just its membrane! It is now a ‘bouncing egg’ … but be careful 😅
This experiment can suit all classes.
I’ve lost the rest of the video (you can view it on my Instagram account) but basically I ‘bounced’ the egg a few times ( from a low height at first) and as I bounced it from a higher point it eventually smashed … so maybe do that part outside 😉
Balloon Rocket
How do rockets work?
In science we used a balloon to help explain Newtons 3rd law, that every action has an equal and opposite reaction.
So how does it work?
It’s all about the air…and thrust. As the air rushes out of the balloon, it creates a forward motion called THRUST. Thrust is a pushing force created by energy. In the balloon experiment, our thrust comes from the energy of the balloon forcing the air out. Different sizes and shapes of balloon will create more or less thrust. In a real rocket, thrust is created by the force of burning rocket fuel as it blasts from the rockets engine – as the engines blast down, the rocket goes up!
What to do:
- Tie one end of the string to a chair, door knob, or other support.
- Put the other end of the string through the straw.
- Pull the string tight and tie it to another support in the room.
- Blow up the balloon (but don’t tie it.) …
- Let go and watch the rocket fly!

Wax/ crayon resistant to paint
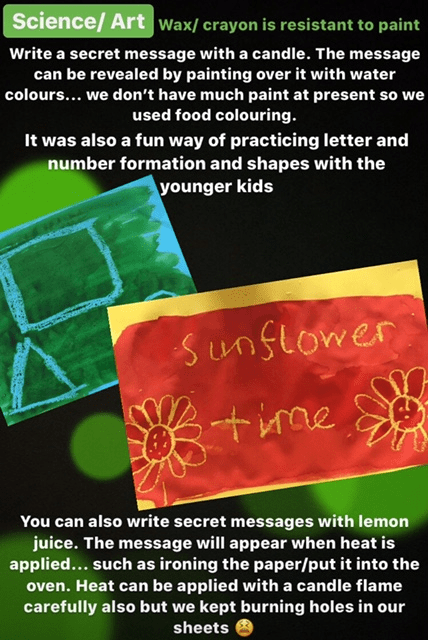
This is an experiment I did over Covid school closures 2020 that worked well. It’s meant to work with white colouring crayons also but I used the end of a candle. I used food colouring but If you have water colours, they work very well when painted over crayon/ wax.
Easy to adapt to suit different age groups… a lovely way to maybe integrate science and art this week.
If you are doing this experiment at home you can write secret messages with lemon juice and when heat is applied, such as ironing over the too, the secret message will appear. When I first tried the secret message experiment it was suggested to hover the paper carefully over a flame…. not a good idea! Mine went on fire 😅
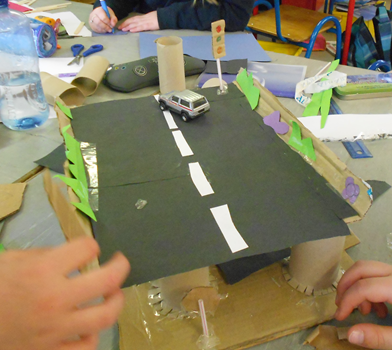
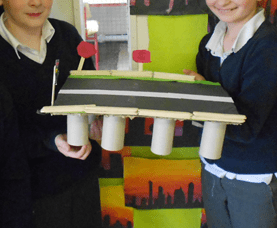
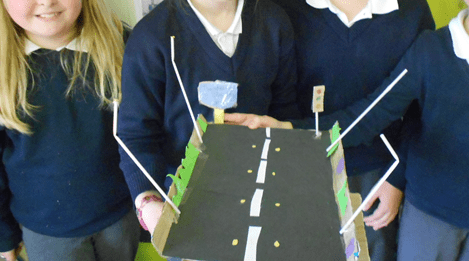
Science: Design & Make a bridge
Design and make activity in Science. Science teams ‘The Science Monkeys’, ‘The Bouncing Brains’, ‘The Brilliant Brain stormers’, ‘The Science Champions‘ and ‘Team Toxic‘ developed their skills of
- Exploring
- Planning
- Making and
- Evaluating
The finished Bridges were tried and tested with toy cars!


3-D Vision
Pupils carried out different experiments to become aware of the difference between how they perceive things using one eye and using two eyes.
Online Illusions: Try some at
http://www.echalk.co.uk/amusements/OpticalIllusions/illusions.html
Pupils reach out and try to touch one another’s fingers very quickly before their brain adjusts and has time to judge distances. Pupils can also try tossing cubes into a tub/jar with one eye closed!

Electricity
Static electricity experiments with balloons.
You can also use plastic pen (rubbed in the hair and then investigate how they gather little pieces of paper). Using a biro pen after rubbing it vigorusly on your scalp, hold it against a thin stream of tap water to explore how the water ‘bends’.


Making electrical circuits
Some teams then removed their bulb and replaced it with a buzzer to make it buzz.
We experimented with creating circuits. We explored open and closed circuits and then each science group made
- Simple circuits
- Parallel circuits
- Series circuits.


Extension activity for older pupils…Design and make a lighthouse!
Tooth decay in Coke (science experiment)
We added a clean white tooth (baby tooth) to coke and examined the decay over the course of a week. The results were shocking after just one day immersed in the coke.
What Do Sugary Drinks Do to Your Teeth?
When you drink sugary drinks, the sugars it contains interact with bacteria in your mouth to form acid. This acid attacks your teeth. Both regular and sugar-free sodas also contain their own acids, and these attack the teeth too. With each swig of soda, you’re starting a damaging reaction that lasts for about 20 minutes. If you sip all day, your teeth are under constant attack.


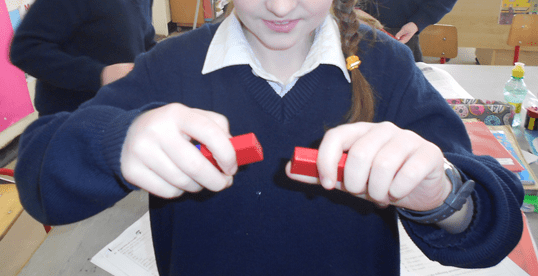
Working with magnets
Pupils worked on a series of magnetic experiments.
- They investigated the magnetic properties of iron and observed iron as an important everyday material.
- recorded which objects are attracted by magnets
- played a magnetic fishing game
- made sculptures and designs with magnets
- found the poles in each of the magnets
- tested which magnets are the strongest
- investigated if magnets will pull through paper
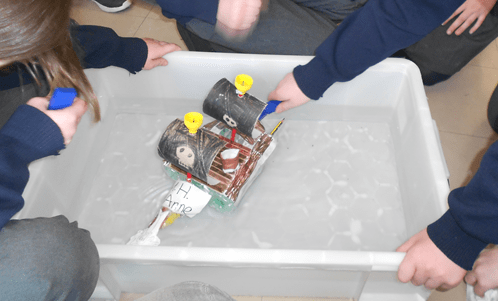
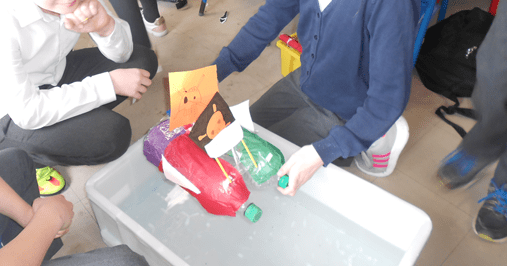
- designed and made a sailing boat that is pushed through water by magnets
1. Pupils can make sculptures and designs with magnets
Pupils create sculptures using various magnets they have explored:
1. latch magnet
2. Bar magnet (alni magnet)
3. Ball magnet
4. Disk magnets
5. Washer magnets
6. Horse shoe magnets


2.Investigate the pull of magnets through paper… Investigate the power of different magnets…how many sheets of paper can the different magnets work through?
3.Investigate the push and pull of magnets
4. Create a magnetic fishing game

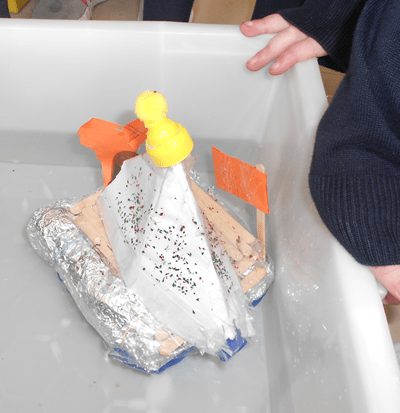
5. Design and Make a boat that moves through the water with magnets!
Each team designed a boat that would first of all float on water. They then added a magnet to their boat to ensure they could use the force of another magnet to move the boat.
A perfect project for Science Week!

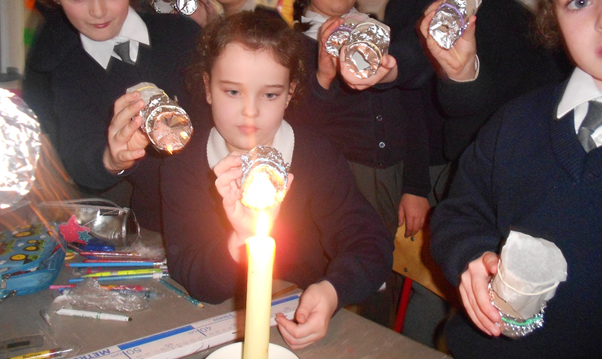
Light (science): Creating a pin hole camera
Pupils created a pin hole camera using cardboard tubing, greaseproof paper, tinfoil and elastic bands.
They created a tiny pin hole in their tinfoil. We darkened the room and used a candle as our light. The light of the candle entered the pin hole and the image could be seen on the grease proof paper. However…the image was upside down. (The image was also reversed but we could need coloured lights to prove that!)
How did it happen?
Images are upside down and back to front in all cameras.
The pinhole did not bend light. The reason is very simple.
Light does not usually bend but travels in a straight line so the light from the top of a scene passes through the pinhole, continues in a straight line, and ends up at the bottom. Exciting! Try out the experiment with torches, multicoloured nightlights etc.


Human Life: Sound
Pupils discovered how stereophonic hearing helps us in locating sound and how important hearing is to insectivorous bats.
Pupils made a model ear drum to test to show how the ear picks up the sounds we hear.

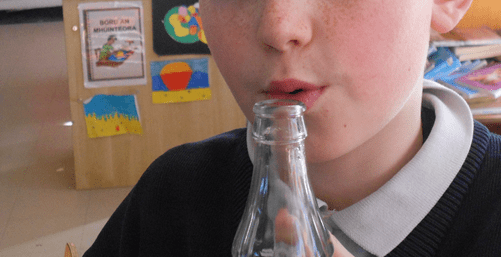
Sound: Loudness and Pitch
Pupils experimented with the sound that bottles make when filled with different levels of water. The bottles with a small amount of water made a deep sound and the bottles with a lot of water made high pitched sounds. Pupils went into groups with bottles of different pitches to create a song.
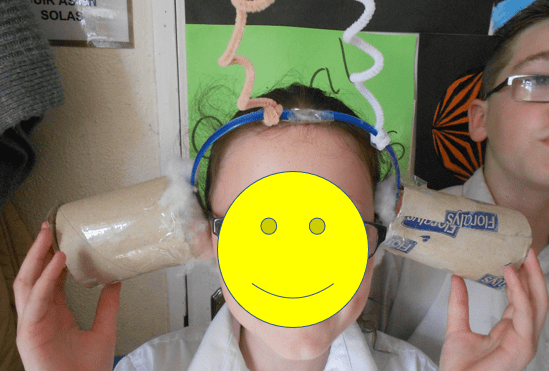
Science: Design and make a set of ear muffs (Sound)
Each science group planned in advance when designing their ear muffs, discussing the need of various materials such as cotton wool, bubble wrap etc. (to muffle sound). Using procedural writing they wrote down their ‘step by step instructions’ for creating their ear muffs. This finished with the hands on creating of the ear muffs and testing their effectiveness.


Plant life
1.Experiment to prove plants need water
Our experiment proved the cress seeds needed water to grow.


2. Children experimented to show that plants have veins that carry water around the plant.


3. Grass haired hedgehogs (Science; living things)
Pupils linked this to their procedural writing, giving step by step instructions on how to make a grass haired hedgehog using a cup, spoon, compost, grass seed and water. Additional option to used button for nose and eyes.
Before:


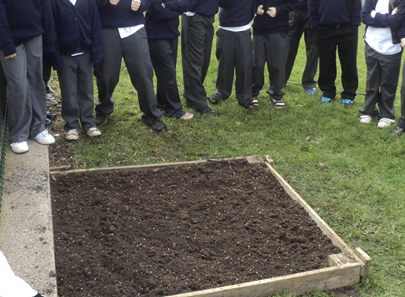
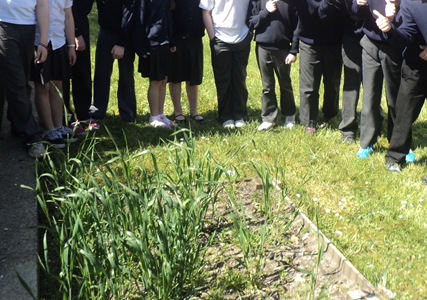
Winter Wheat
Pupils can sow winter wheat in October/ November
We returned to visit the cultivation bed to assess how the wheat was growing later in the year. It should be ready for harvesting the following September…you could try grinding some of the wheat to show where flour comes from (even make some buns!)

Materials and change: Using household ingredients
Science Materials and change
1. Pupils carried out an experiment with simple kitchen materials (vinegar and Baking soda) to show chemical reactions. Extend to creating the ‘volcano’ experiment or ‘puking pumpkin’ (or puking butternut squash if it’s not Halloween)


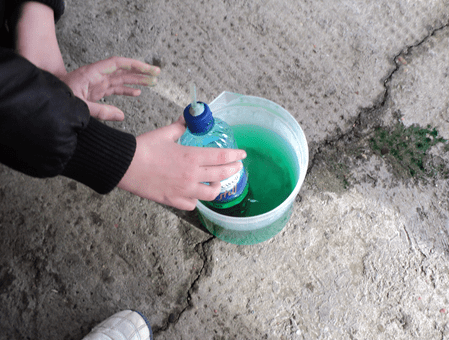
We loved our Puking Pumpkin science experiment! We are spending a few weeks experimenting with chemicals and change using household items. In this experiment we investigated combining the vinegar (an acid) with the baking soda (a base) which results in an entirely new substance, carbon dioxide. A chemical reaction occurred!
We added green food colouring (just for effect!) and also some Fairy Up Washing liquid as the washing liquid adds more bubbles and helps to thicken the resulting chemical reaction.

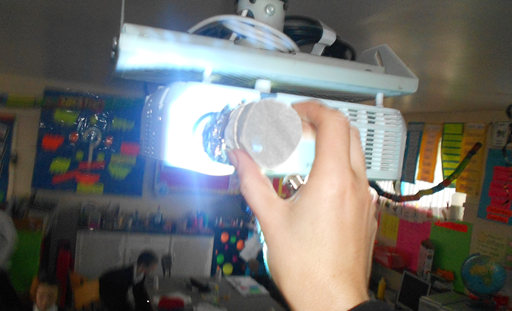
2. Each science group had to carry out an experiment to prove that air expands as it is heated
3. Pupils had to design and make a ‘Cool Can Holder’. Pupils discussed what materials can be used to keep drinks warm or cold. They applied this to their design and make activity. The same amount of cold water was put into the cans at the end and temperatures taken often to determine which can can of water stayed the coolest.


Great ideas, thank you!
LikeLiked by 1 person
Glad you liked them.
LikeLike